Nothing beats the warm, comforting taste of a classic vanilla cake, whether it’s for a special occasion or just because you’re craving something sweet. This simple, yet delicious recipe will guide you through the process of creating a fluffy and moist vanilla cake from scratch. With just a few ingredients and some careful attention to detail, you can create a dessert that will be loved by everyone. Let’s dive into the step-by-step guide!
Ingredients for Classic Vanilla Cake
Before you start, make sure you have all the ingredients ready. Here’s what you’ll need for a light, fluffy, and moist vanilla cake:
- 2 1/2 cups all-purpose flour
- 2 1/2 teaspoons baking powder
- 1/2 teaspoon salt
- 1 cup unsalted butter (softened)
- 1 1/2 cups granulated sugar
- 4 large eggs
- 1 tablespoon vanilla extract
- 1 cup whole milk (room temperature)
Step 1: Prepare the Baking Pans
Start by preheating your oven to 350°F (175°C). While the oven is heating, grease and flour two 9-inch round cake pans. You can also line the bottom with parchment paper to prevent sticking. This will ensure that your cake layers come out smoothly after baking.
Step 2: Mix Dry Ingredients
In a medium-sized bowl, whisk together the flour, baking powder, and salt. Set this aside. The dry ingredients are the foundation of your cake, so make sure they’re well combined for an even texture.
Step 3: Cream Butter and Sugar
In a large mixing bowl, beat the softened butter and granulated sugar together using a hand mixer or stand mixer on medium speed. Continue mixing until the butter and sugar are light and fluffy. This process helps incorporate air into the batter, which contributes to a lighter, fluffier cake.
Step 4: Add Eggs and Vanilla
Next, add the eggs one at a time, beating well after each addition. Be sure to scrape the sides of the bowl to incorporate any butter or sugar that may have clung to the sides. Once all the eggs are added, mix in the vanilla extract. This step adds flavor to the cake and ensures a smooth batter.
Step 5: Combine Dry and Wet Ingredients
Now, you’ll need to combine the dry ingredients with the wet mixture. Alternate adding the dry ingredients and the milk to the butter mixture, beginning and ending with the dry ingredients. Mix gently after each addition to avoid overworking the batter, which can result in a dense cake.
Step 6: Pour the Batter and Bake
Once your batter is smooth and well-combined, divide it evenly between the prepared cake pans. Use a spatula to spread the batter into an even layer. Place the pans in the preheated oven and bake for 25-30 minutes, or until a toothpick inserted into the center comes out clean.
Step 7: Let the Cakes Cool
Once the cakes are done, remove them from the oven and allow them to cool in the pans for about 10 minutes. After that, turn them out onto a wire rack to cool completely. This step is crucial for ensuring that the cake doesn’t break apart when you frost it.
Step 8: Frost and Decorate (Optional)
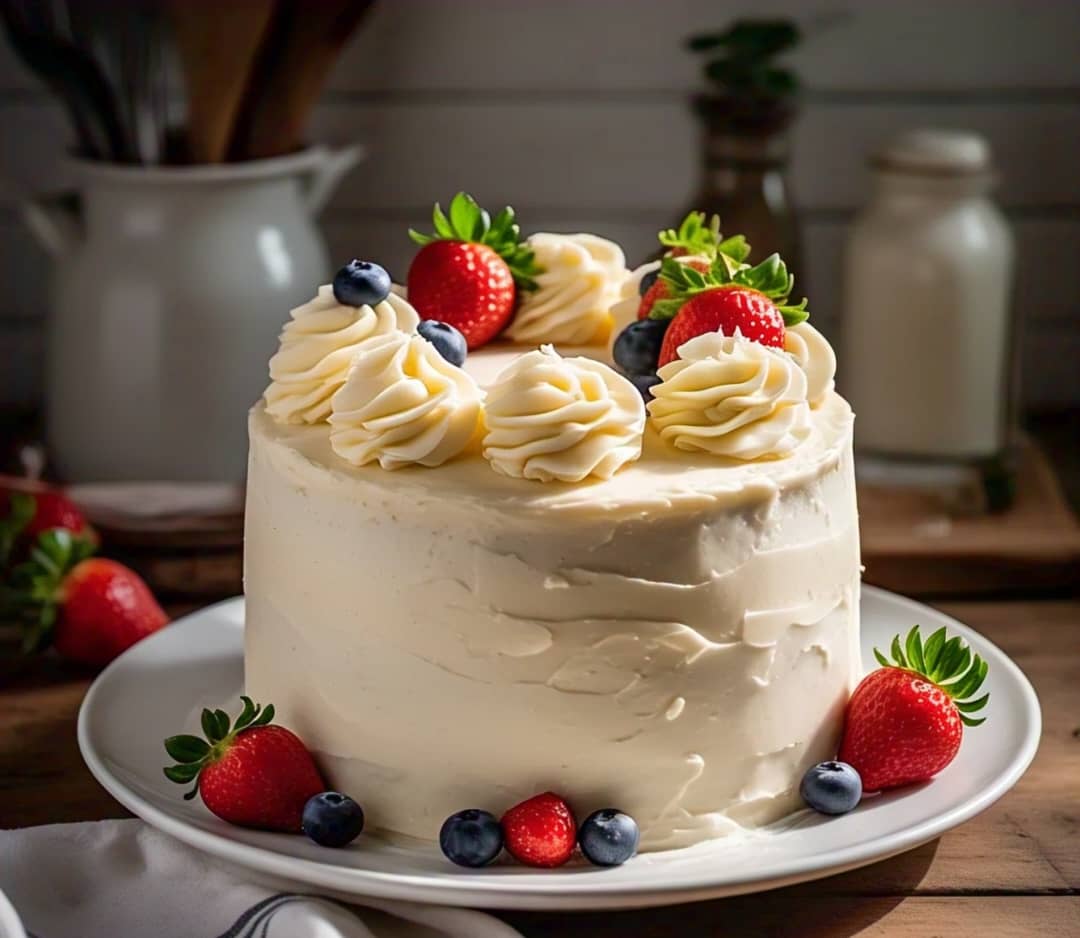
Once your cakes are completely cooled, you can frost them with your favorite frosting. Classic vanilla buttercream works beautifully, but you can also use chocolate, cream cheese, or any frosting of your choice. For a simple decoration, top the cake with some sprinkles or fresh berries to make it look as good as it tastes.
Conclusion: Enjoy Your Homemade Vanilla Cake
Your homemade classic vanilla cake is now ready to be enjoyed! The beauty of this cake lies in its versatility—whether it’s served at a birthday party, a holiday gathering, or just as an afternoon treat, it will surely be a crowd-pleaser. Share it with friends and family or enjoy a slice with a cup of tea. Either way, you’ll be savoring the sweet success of a classic dessert made from scratch.
Enjoy your delicious homemade vanilla cake and happy baking!


